

Self Care Sunday: Beachy Bath Essentials

Spending more time at home this past year has unlocked a new obsession for me — a darn good bath. I make time to take one every week, and it’s become my favorite way to chill out and enjoy some little luxuries. I started out small – a bath bomb at first, a candle here and there, and now we've gone fully extra, with Netflix on the iPad and a glass of bubbles and a color-changing underwater light (instant vibes!) and it makes it even more enjoyable.
I think what I love so much about it is connecting with water again, which is where I feel most relaxed. If I can’t be swimming in the lake or floating in a pool, this is next best! It’s been a great winter remedy and I’m continuing to enjoy it through spring. Some of my bath essentials are linked below if you’re a bath lover too, or looking to add them to your self care routine. Let me know if you give any of these a try!

SHOP THE POST


Our Home Tour on Modern CLE

Have you guys been reading Modern CLE? If not, what are you doing — head over there now and catch up! It’s a digital magazine for the modern Northeast Ohio girl, covering money, politics, lifestyle, career, and more. It just launched in early November and is already making quite a (well-deserved) presence for itself!
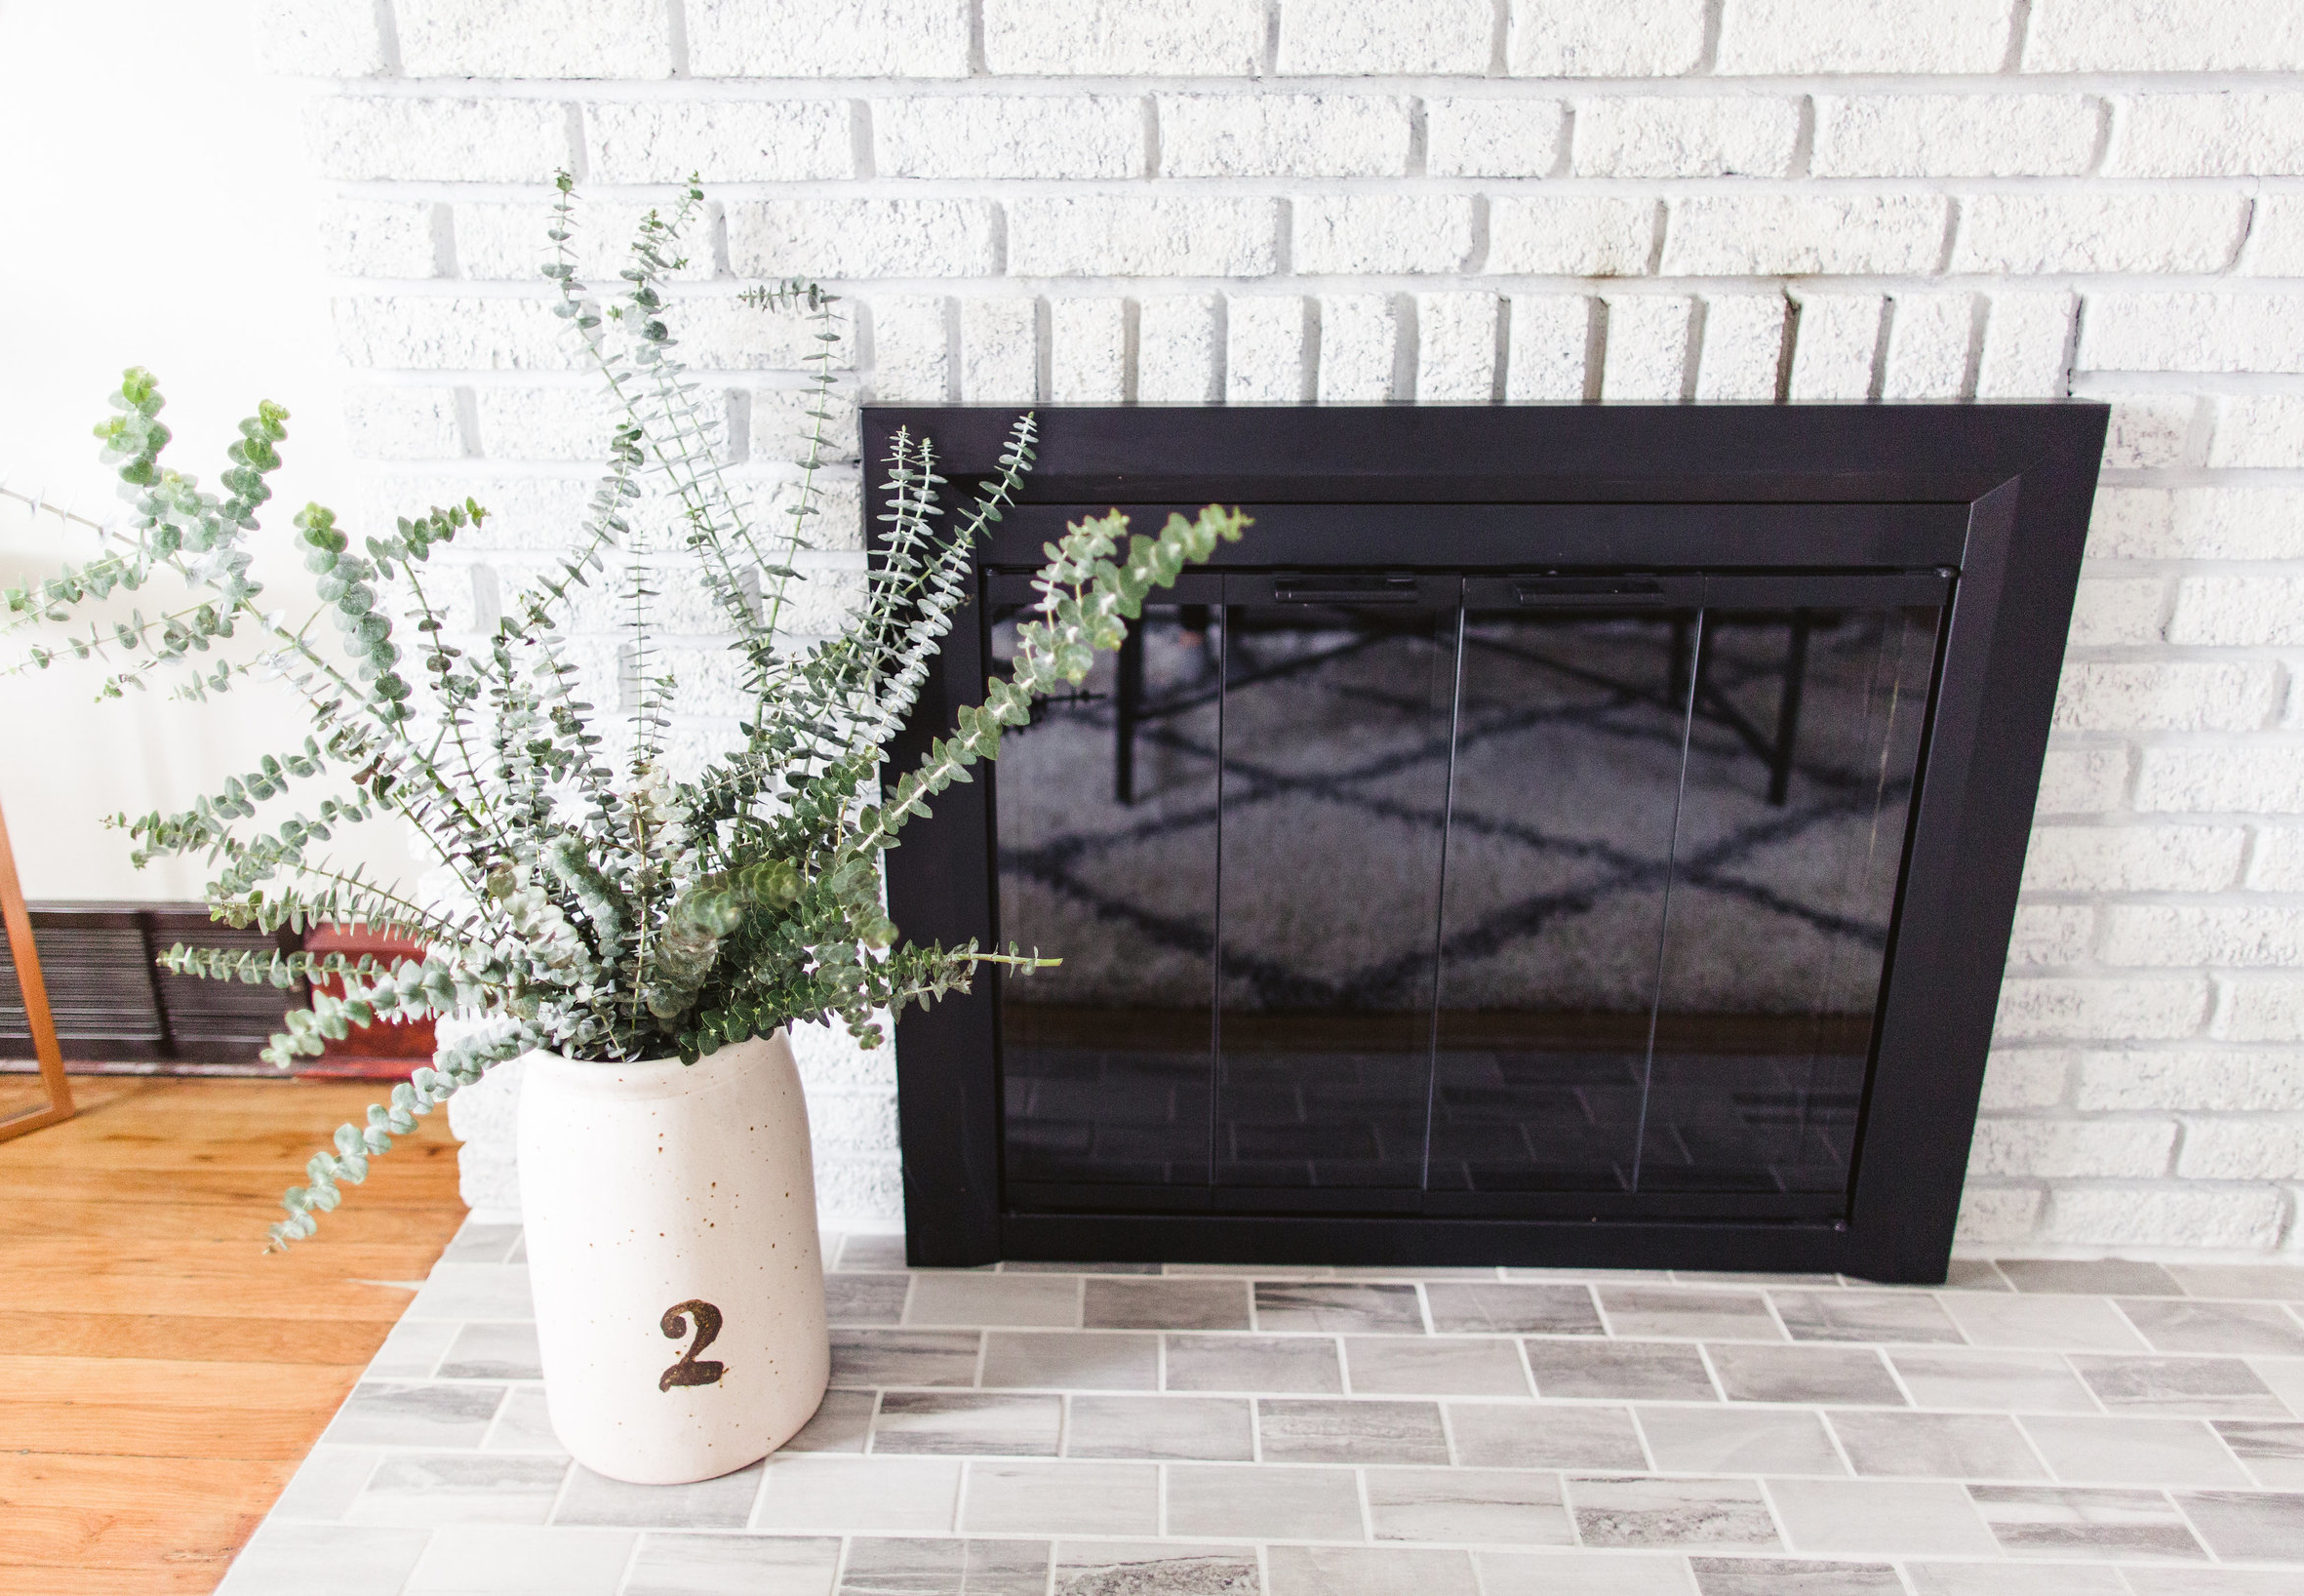
I was so honored to be their first home tour feature, and to share more about our renovations and design process. If you’ve been following my blog for some time, you’ll know we’ve been slowly working away on our Lakewood colonial, which is about to turn 100 next year. I’ve loved sharing the progress with you, and continue to receive lots of questions about the products and items featured in our home — and I truly appreciate all of the feedback and interest! We tried to list the sources for everything pictured in the photos, so hopefully that will be a helpful resource if you’re looking for something similar for your space.
You can head over to read the post here — with a huge thank you to Kayla Coleman Photography for her time and talent on these beautiful photos. I’ll treasure them always.
You can also click here to view previous posts on our home renovations.
Thank you all for reading!

Spring Greenery, Five Ways
It feels official after that beautiful Easter weather – spring is on its way! I've spotted a few buds popping up in my garden, but am all too anxious to start seeing green. Luckily, I've teamed up with the lovely Bronwen from Twig Florals to show you some creative and accessible ways to bring greenery into your home this spring (or year-round)! We had a fun day shooting with Lauren Gabrielle Photography, and I was thrilled to collaborate with Bronwen again, who was the talent behind our wedding florals.
Many of the greens featured here can be found at a garden center or grocery store (think Trader Joe's, Whole Foods, or Heinen's). We'd also recommend calling your local florist – they are usually willing to order anything specific you might need. Just be sure to ask about minimum order quantities, since they are likely working with a wholesale supplier. Continue reading below to learn about the varieties we used, and see how to spruce up your home for spring!


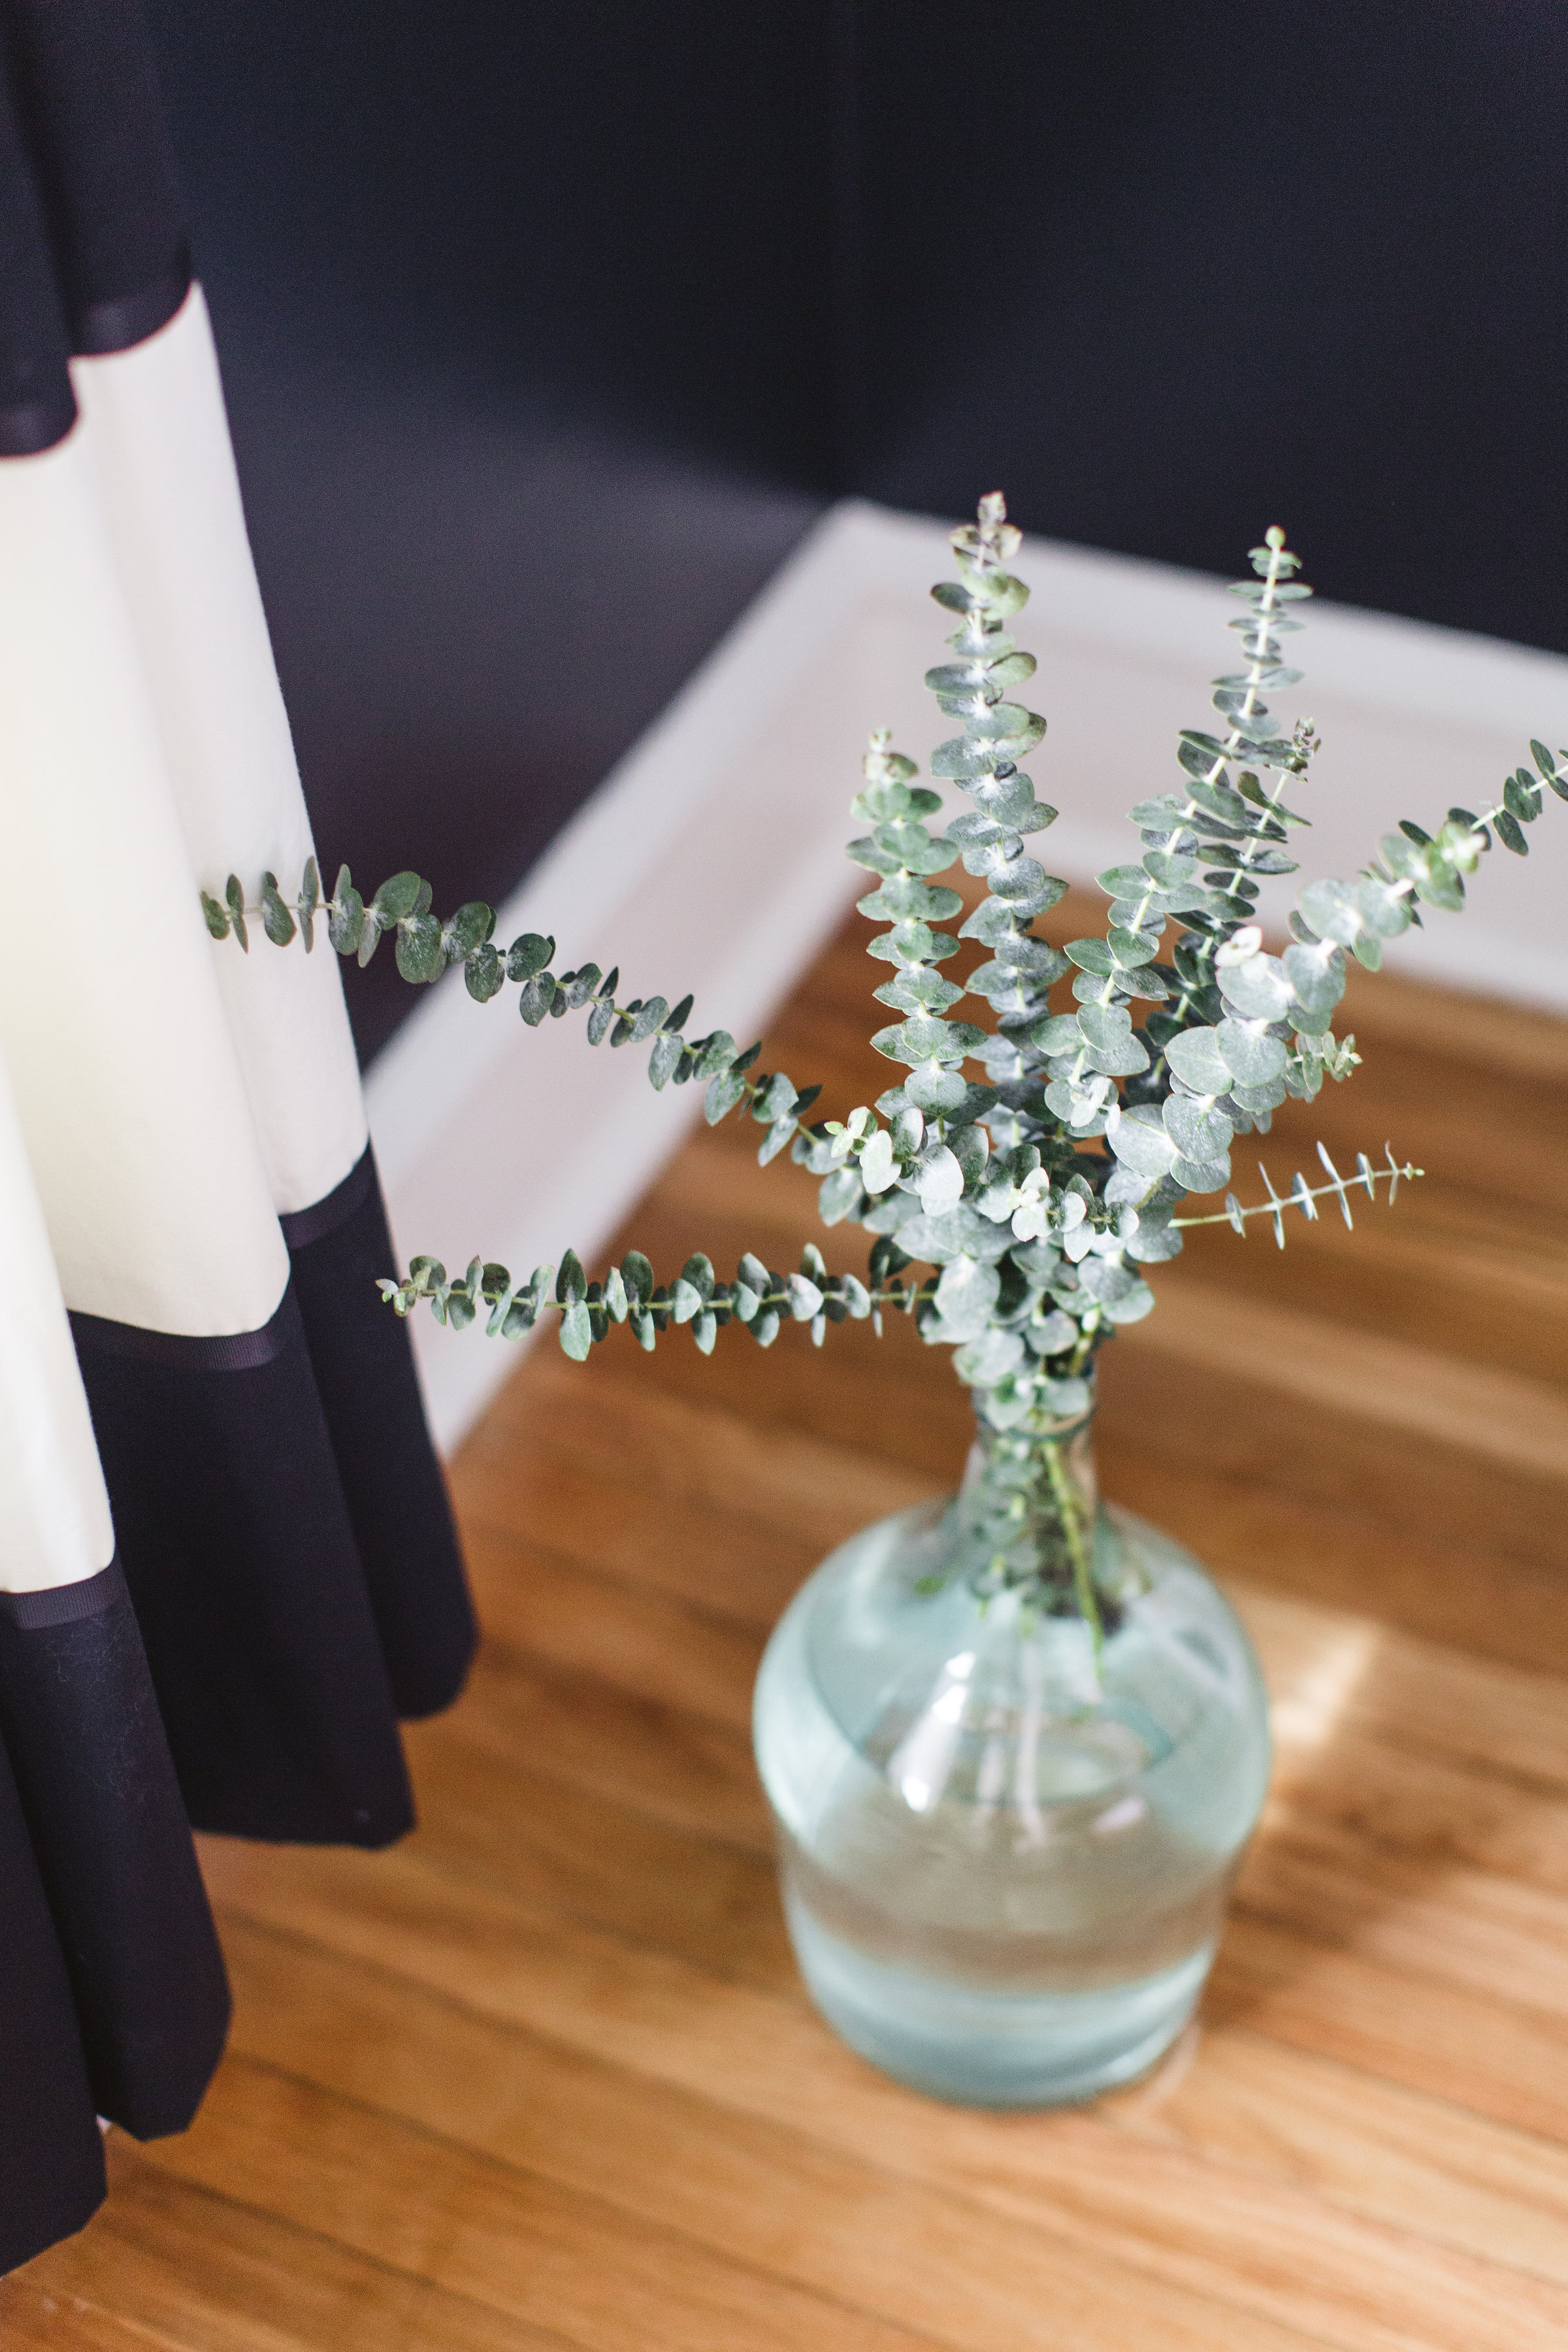
Greens Used: Baby Blue Eucalyptus
Blue eucalyptus can be so impactful – it smells amazing, and its silvery blue leaves add a striking focal point to any color palette. I usually place a sprig or two in bud vases, but loved Bronwen's suggestion to fill a large vessel with a bunch of stems. Here, we used a terra cotta crock and an oversized blue bottle, but you could also recreate the look in a galvanized metal vase or bucket. The look is very easy to accomplish – fill your vessel with water, and place your stems in, a few at a time. Arrange the taller stems toward the middle, with shorter stems along the sides.


Greens Used: Rosemary, Tree Fern
For the freshest greens, look no further than your own backyard! Bronwen suggests exploring your yard or neighborhood for vines, fresh-cut sprigs from bushes, or even herbs from your garden to add to small bud vases or bottles. Rosemary, mint, thyme, or lavender make beautiful and aromatic additions to small spaces or shelves. These would look charming in a kitchen, on a bar cart, or on a side table in a guest room. Don't have an herb garden? Hit up your grocery store for pre-packaged stems in the produce section.


Greens Used: Ruscus Vine, Green Hydrangea, White Aster
This wall arrangement would make a beautiful statement for a party, a shower, or seasonal brunch. Here, we used a "K" as a monogram design, which would be super cute to represent a bride's new last name, or a baby's initial for a baby shower. You could also arrange the greens in a shape instead of a letter – a heart or circular wreath would work nicely. This makes a statement no matter where you hang it – we chose to place it over a mantle, but you could also arrange this over a bar cart or table setup for a party.


Completing this arrangement takes a bit of time and finesse, but it's not overly advanced. We recommend starting with a sketch, then translating that to the wall.
Cut the vine into sections to make up the limbs of the letter (the sizes will depend on how large you're making it). Attach each vine to the wall using masking tape, securing where needed. Try to hide the tape if you can, or choose a tape that matches your wall color. Once your vines are in place, you can add bits of florals to enhance the monogram. Here, we used small snips of green hydrangea and white aster (which look like mini daisies) to complete the spring look. Attach them to the vines using tiny bits of tape.
If you can't get your hands on ruscus vine, you could likely forage some English ivy from your neighborhood (you know, the vines that grow like crazy over fences, walls, basically anywhere you don't want it)! Green hydrangeas always seem to be available at Heinen's (for the local readers) and you could probably find the white aster there as well.


Greens Used: Sword Fern, Tree Fern
For a more everyday look, use a collection of mini bottles to create a statement in numbers. These are easy to find at craft stores or thrift shops, and look great when arranged with a variety of other colors, shapes, and sizes. Here, we filled them with a mix of sword fern and tree ivy – the contrast of the whispy tree ivy and the strong, straight nature of the sword fern makes for an interesting pairing. Sticking with only 2-3 types of greenery will also keep the look from getting too busy. Arrange them on a console table as shown, or line them up on a dining table for an interesting centerpiece.


Greens Used: Seeded Eucalyptus, Rosemary
This is another super simple (yet super beautiful) way to spruce up your dining table for a spring brunch or a romantic dinner at home. To create this look, you'll want to start with approximately 10-12 stems of seeded eucalyptus. You can usually find seeded eucalyptus at a premium grocery store, but I've also been able to get it through a local florist.
Using scissors or pruning shears, trim off the thick portion of each stem, leaving only the more delicate main stem that the leaves and seeds are attached to. Starting from one end of the table, place one stem after another, overlapping them to create fullness. Fluff and arrange the leaves as needed to fill in any gaps or to hide the stems of the other pieces. And that's it!


You can enhance the look by introducing some greenery in your place setting – here, we simply tucked a sprig of fresh rosemary into the napkin ring.


Another way to enhance the "green" of your table setting is to include them in in edible form! We loved the added sprigs of mint on the cakes – it looks so fresh and ties the greenery element into the desserts. These stunning bundt cakes were made by Salt + Honey Baking Co. and tasted as luxurious as they looked. We were certainly not complaining about eating the props ;)
Bronwen and I were excited to share this little dose of DIY, just in time for spring. I love to bring the outdoors in, and until my garden starts blooming, these are five easy ways to do it (which don't involve the constant care of a houseplant, either)! If you have questions about any of the looks you've seen here, feel free to leave a comment and either Bronwen or I will happily answer them. Huge thank you again to Bronwen, Lauren, and Salt + Honey for making this little collaboration happen. Happy spring to you all!
Spring Decor: Planters + Vases

I didn't shop for planters much until we moved into our house, and realized we needed more plants around our outdoor hangout spaces. Having potted plants on your patio, steps, or porch add depth to your landscape and make the space more welcoming. Plus, it's a great excuse to get a cute watering can (holla)! Right now I'm really digging these utilitarian concrete slanted planters from CB2.
A wide, glass vase is my go-to favorite for spring flowers, especially tulips. They spread out so perfectly and droop over the edges...it's a great look. Crate and Barrel has THE BEST basic vases. You can't go wrong, and they're so affordable.
Are you a vase addict like me? What decor just gets you every time?
Home Series: Before & After | Master Bedroom

When it comes to naming which room in our house got the biggest overhaul, our master bedroom takes the cake—although just our hallway is a close second. You'd never think a hallway could be so much work, but that's a post for another day. It's amazing how after seeing dozens of houses, you develop this ability to not take anything at face value—and I don't mean just looking beyond paint colors. You can look at a lackluster room and feel like the space is right, or you notice how cool a corner is, or you feel how firm and right the floors are beneath your feet.
This was the bedroom before:

As you can see in our progress post from our first week, we cut that small closet door open, installed new bars and shelves, ripped up the carpet, refinished the hardwood, and replaced that sad ceiling fan. The closet itself was quite big, but had that "cave closet" problem where the door is small and the closet is impossible to utilize fully. We expanded the entrance, replaced the doors, and actually reused the old closet door for our linen closet in the hallway. We really wanted to keep all of the original doors to the house, so I'm glad the door fit!
A nice master closet was something we hadn't seen in any of the Lakewood homes we looked at, so we knew a remodeled closet would be a great selling point someday (and a necessity for us now).
This is the closet after, with our DIY rope mirror:

Our progress at one year:

Curtains: DIY | Gold Tortoise Shell: Target/DIY | Nightstands: IKEA | Reading sconces and table lamp: IKEA | Duvet: CB2 (old) | Rug: Overstock (old)
I really love the drama of dark walls and wanted to pull it off in our room with a super rich navy. We get a ton of light in our house so I knew it wouldn't be too dark, and we balanced it with lots of white and texture. The room has a tiny touch of nautical inspiration, but it's more relaxed and less literal.
There is still so much we want to add and change about the room (we're wanting a stylish new bed frame) but after a year, we're really happy with the progress. As it is with all spaces, there's always something to do! For now, it's an incredibly relaxing, rehabbed space that we're just enjoying.

Home Series: Before & After | Outdoor

Welcome to our outdoor home tour! In the spirit of thinking spring, I need some sunny memories of our green grass and garden to restore my sanity. It's hard to remember that things looked like this only a few months ago! We worked all spring and summer long to give the exterior of our home a facelift, and we're relieved the majority of the work is done. Let's get to it, shall we?

Here is our "after": with a fresh coat of paint on literally every surface, newly built columns and railing, landscaping, and new hardware (mailbox, light fixtures, etc.) The gray is Sherwin Williams Dovetail and the mint is Waterfall. The house is sided with aluminum, so we had to bring in the pros to paint it for us – we hired Neubert Painting to do it. It was incredible to see the house transform a little more each day. They painted the exterior of the house, but we painted the columns, railing, and porch floor ourselves. Pretty much every day after work, I was coming home, grabbing a beer, and painting something on that porch. It was actually kind of a nice way to spend the summer.

This was the house before. This was taken in the late fall, so the dead plants definitely make it look a little worse – the inside was so warm and charming, we wanted the outside to match.


A big, concrete slab of some sort in the back corner of the yard. We heard the concrete patio had been there for years, so we decided to get a jackhammer and take it out.

We rented a jackhammer and towed away tons of solid concrete, while ripping out the other stones and the small tree that was in the middle of the yard. We planted grass where the patio had been and hoped for the best! It was terrifying to think the grass might not grow (first-time jitters) but obviously, it was fine. We watched it grow in and followed up by planting some new shrubs along the fence.

Here is the "after" at the end of the summer. We still have some more shaping to do to the beds, but the work that's been done has made a huge difference. We've gained a ton of yard space by removing that slab, which Cooper loves!
Last winter, we were so anxious for spring to come so we could tackle all of these projects. We moved into the house in October of '12, facelifted the inside, and sat waiting to do the rest. We are really happy with how it all looks and can't wait to do more a bit more relaxing this summer – although there is definitely always something to do. Our next project is to furnish the front porch, and furnish our second-floor balcony that's situated off the office. You are all welcome to join me for summer drinking in any of these areas :) Are you planning any home projects for this spring?
Home Series: Why To Buy

Neighborhood – We love being a part of a neighborhood, and there's nothing like handing out candy on Halloween. For some reason, that's one of our favorite things to do and it's a reminder of how much we love where we live. We wanted to be more than transient members – by putting hard work into improving our house, we feel like we are helping to improve our community as well. We wanted to give an old Lakewood house some TLC and leave it better than it was left for us.
Target Holiday: Cozy Luxe

DIY: Prada Marfa Sign
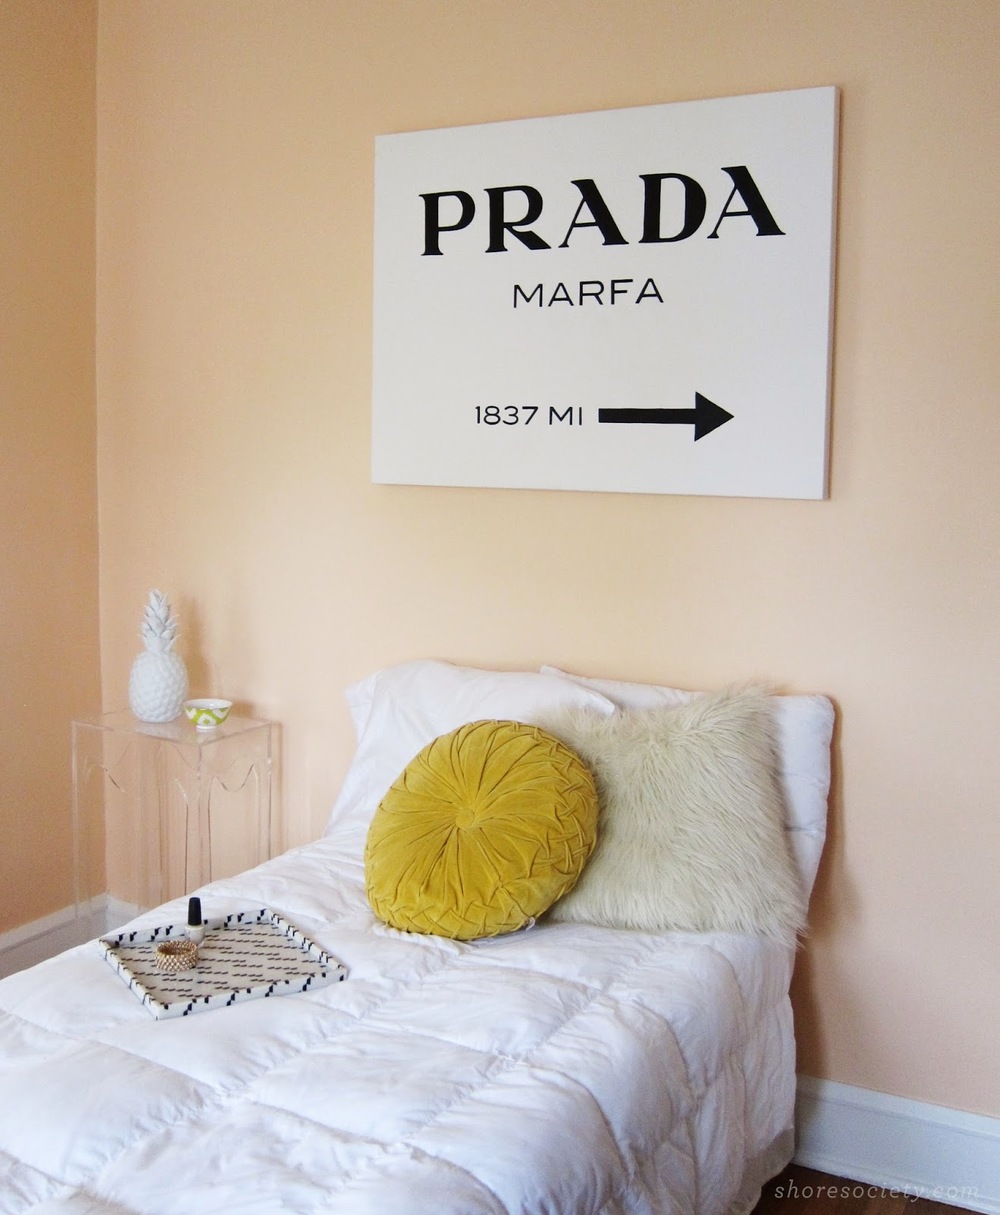
When it comes to Gossip Girl, I am not embarrassed to admit that I know a bit too much about the show, and anyone who's a fan knows about the top-notch art collection shown in GG's various Upper East-side apartments.
One of the set's most recognizable pieces is an illuminated sign by Elmgreen and Dragset, meant to serve as a road sign for the pair's famous art installation – a non-functioning faux Prada store about 60km outside of Marfa, Texas. It serves as a perfectly chic backdrop to the stylish characters and money-drenched drama—it's always somewhere in the scene. It's black+white and gorgeous, so clearly, I wanted it in our peachy-glam guest room.
As an art enthusiast lacking an art collector's budget, my only options to own this iconic piece were to either purchase a canvas version here, or make my own. You all know I like a challenge, so off to the drawing board I went. This looks a lot harder than it was (although it takes a steady hand) so here's a step-by-step plan if you're interested in making your own.
WHAT YOU'LL NEED:
Pre-stretched art canvas - I went with 30x40" for the full large-scale effect, like the original.
Black acrylic paint + brushes
Black permanent marker
Printer
Adobe Photoshop or image editing software
X-acto knife and cutting mat
Ruler
Easily removable tape (painter's or washi tape will do)

1. Start by creating the template for the design. To do this, I used an image of the artwork online, and imported it into Photoshop. I created a new Photoshop file in the size of the canvas (30x40") and imported the image as a layer in that file. I played with the scale of the art until the size looked correct, and printed the giant image out by tiling it onto regular letter-sized sheets of paper. Each printer is different, so I can't exactly walk you through how to do this, but Google can be helpful if you're not sure. Since you'll be scaling up a low-res web image, the letters will be pixellated, but you can cut away that fuzzy pixel halo when you trim the letters out.
2. To make the stencils, you'll carefully cut out each number and letter. I found that it made the most sense to cut the larger characters out ("Prada" and the arrow) and the smaller characters away from the sheet of paper, keeping them together like a stencil. This way, they're easier to trace and you won't have to worry about aligning each letter on the baseline, as they're already aligned for you.
3. Use a ruler to figure out the placement of the stencils on the canvas. I recommend having an image of the actual art pulled up on your computer, or printed out, so you can reference the linespacing. It won't necessarily be mathematically even, you just want it to look right. Double-check all of your measurements to be sure nothing is slanting up or down—the type is the hero here, and anything "off" will become pretty obvious once you paint. When you're sure, carefully tape everything down.
4. Now, trace everything. Use a pencil and be very, very gentle. It's difficult to erase pencil off of canvas, and you'll only need a ghost of a line to guide you during the painting process.

5. Once you've outlined everything, remove the stencils and tape and double check that everything looks correct before you begin to paint. I suggest taking a look from a distance – prop the canvas up against a wall and see how it looks from there.

6. Finally, you'll paint in the letters. You can make it easier on yourself by outlining the letters with a marker first, to get crisper edges. You'll probably need a few coats of paint to get everything looking solid. It's actually better to have your paint thinned down a bit with water or acrylic medium, because it will make the paint glide more smoothly across those detailed curves. Just keep layering the paint on, allowing it to dry between coats. Acrylic dries very quickly—by the time I finished one application, the first letter I did was ready for a recoat.

Easy as that! I feel like Lily Van Der Woodsen already. We're still working on finishing up the guest room, but this is starting to pull it all together. Let me know if you decide to give it a try!
Black & White

So sometimes, the mind needs a break. Black and white provides a duality that few combinations can produce: a sense of simplicity and peace while conversely shouting for attention. The contrast is stimulating; the minimalism restful. I love it as the single statement in a room, or as a graphic addition to an already colorful space.
I'm absolutely obsessed with this graphite loveseat – the pencil-drawn lines are a less graphic take on black and white – it would look so cool in a gleaming white office!
I recently did a DIY of the Prada Marfa canvas shown here, so I'll be posting that soon – likely next week. It came out so well and cost a fraction of the price – win/win. Can't wait to share it!