
DIY: Ombre Curtains

When it came to buying things for the house, curtains were the one thing that I was excited to look at, but not excited to buy. Have you bought curtains lately? They are so unbelievably expensive (at least the ones I wanted were) and you never need just one panel. That's where things get crazy — you start counting the windows in your house, ca-ching ca-ching!
Next thing you know, you're spending a grand on fabric that hangs from your windows.
After I convinced myself that buying those Anthropologie curtains would be totally insane, I thought about making a DIY version of them. When I realized the ruffles might just be a little too much, I decided to keep with the idea of hand-dying, but go with something a little simpler.
This was a very easy DIY, but it took some time to get the hang of it. You'll have to set up your work are to suit your space — I've read that you can do this outside with a clothesline, or if you have somewhere else to drape/pin up the curtains to dry, that works too. This is definitely a bit on the messy side, so be sure to wear your paint clothes just in case, and put a tarp down.
YOU'LL NEED:
2 white curtain panels (mine are from Target)
2 bottles of liquid RIT dye in teal (or color of your choice, for the
main
part of the ombre)
1 bottle of liquid RIT dye in royal blue (this is for the bottom dipped piece)
Bucket
Pair of rubber gloves
Nearby sink or hose
Clothesline + Pins
Tarp
Pen
Beer! (duh)

DIRECTIONS:
You will dye the panels one at a time, so I'll walk you through one, then you just repeat!
1) Measure + mark
: The bottom half of the curtain will be the ombre part, and the top will remain white. So first, fold each panel in half and make a light pen mark on the back side of the panel, along the edge. These marks will help tell you where to stop when you're pulling each section out of the dye. This halfway mark is where you will dip to when you begin. Then, measure that bottom half into thirds and mark those sections. These will make the ombre gradation easier for you to plan — if you want to wing it, go for it! I found that there were plenty of other "happy accidents" that occurred, so I'm glad I at least measured and got the sections to be somewhat even. You still get a natural look with measuring.
2)
Rinse + Dip: Rinse each curtain in warm water before beginning. You want them damp, not wet, so squeeze out excess water. Fill a bucket with the hottest water you can, and add one third of one bottle of teal dye. With a gloved hand, swish the dye around in the water to mix it. Next, dip the curtain into the bucket and stop at the halfway mark. Let this section soak for 5 minutes.
After 5 minutes, add another third of the bottle of teal dye to the water, careful to not pour directly onto the curtain. Again, swish the dye around to mix. Pull the curtain out to the next pen mark. Let this part sit for 10 minutes.
For the next section, add the remaining dye (last third) in the bottle and pull the curtain out to the bottom third. At this point, you might need to pin up the curtain so it's not laying on the floor. Set a timer for 10 minutes.
Now that the curtains have been dyed in teal ombre (and hopefully looking really cool) you're going to rinse them (I believe in cold water, check the instructions on the dye). A lot of dye is going to rinse off, so don't freak out, it won't come off the curtain :) They will lighten up slightly, so take that into consideration with your dipping times and adjust depending on the look you want.
Gently give them a squeeze to get excess water out, then hang them to dry slightly. This was when I moved on to the next panels (I did three), so now you can repeat. Dump out your bucket and start fresh for each panel.
3) Dip the bottom: After all the panels were dyed teal, it was time to dip them in a darker color just to add that extra bit of gradation. In a bucket of hot water, add half the bottle of royal blue dye. Hang the curtain and dip just the very bottom in the bucket. I didn't measure this, just eyeballed it. Let this soak for 10 minutes. Repeat this for the second panel, with a fresh bucket and the remaining half of the dye.
4) Rinse + hang: Rinse the bottom portion that you just dyed, and hang these puppies up to dry! A little tip for hanging - make sure if you have to fold the curtains over the clothesline (if they're too long to just pin) don't let the white portion touch the dyed areas at all. The littlest bit of wet dye will leave spots. If you do get a spot on the white, you can spot treat them with bleach right away.
Let them dry overnight, then you're ready to go!
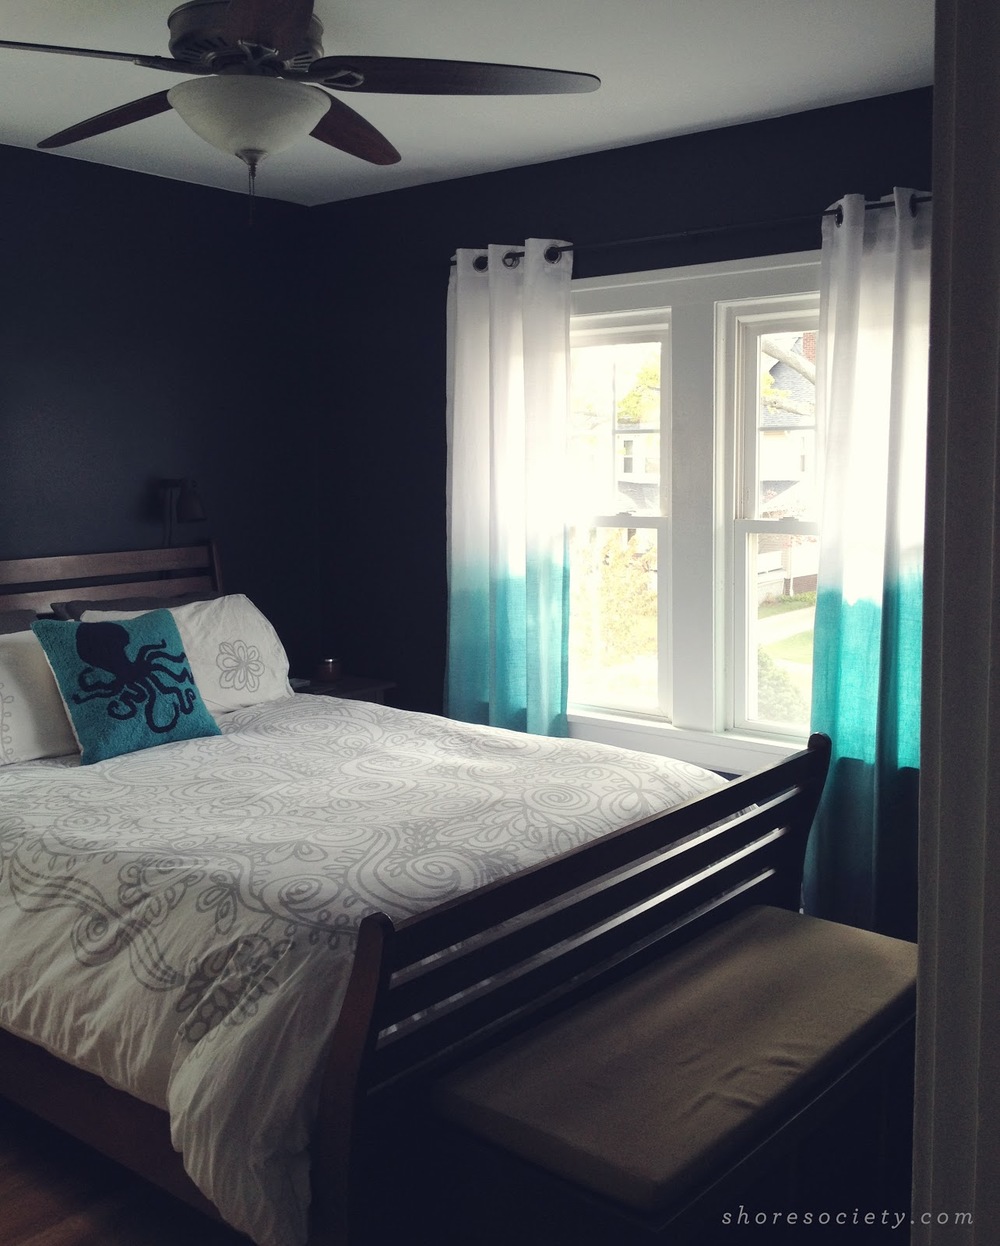
They look so airy and beachy, and beautiful when the light comes through. I couldn't be happier with this DIY — it's budget friendly and totally customizable. You can make as many curtains as you want, in whatever colors you want.

I also kind of want to dye everything now — have you ever dyed anything for fun? Aside from those tie-dye tees we made in the 90s?
I was so encouraged by making these, that I decided to make my own bold striped curtains for the living and dining rooms. That one doesn't involve dye, but it's equally as easy. I'll be sharing that DIY shortly, so check back!